The post How to Remove Image Background in GIMP Fast & Free appeared first on Grasigner .
]]>GIMP, short for GNU Image Manipulation Program, stands as one of the most powerful free and open-source alternatives to premium photo editing software like Adobe Photoshop. Whether you’re a beginner exploring graphic design, a photographer preparing product images, an e-commerce seller needing clean visuals, or a seasoned designer seeking precise control without subscription costs, GIMP delivers an impressive array of tools for professional-grade edits, including seamless background removal.
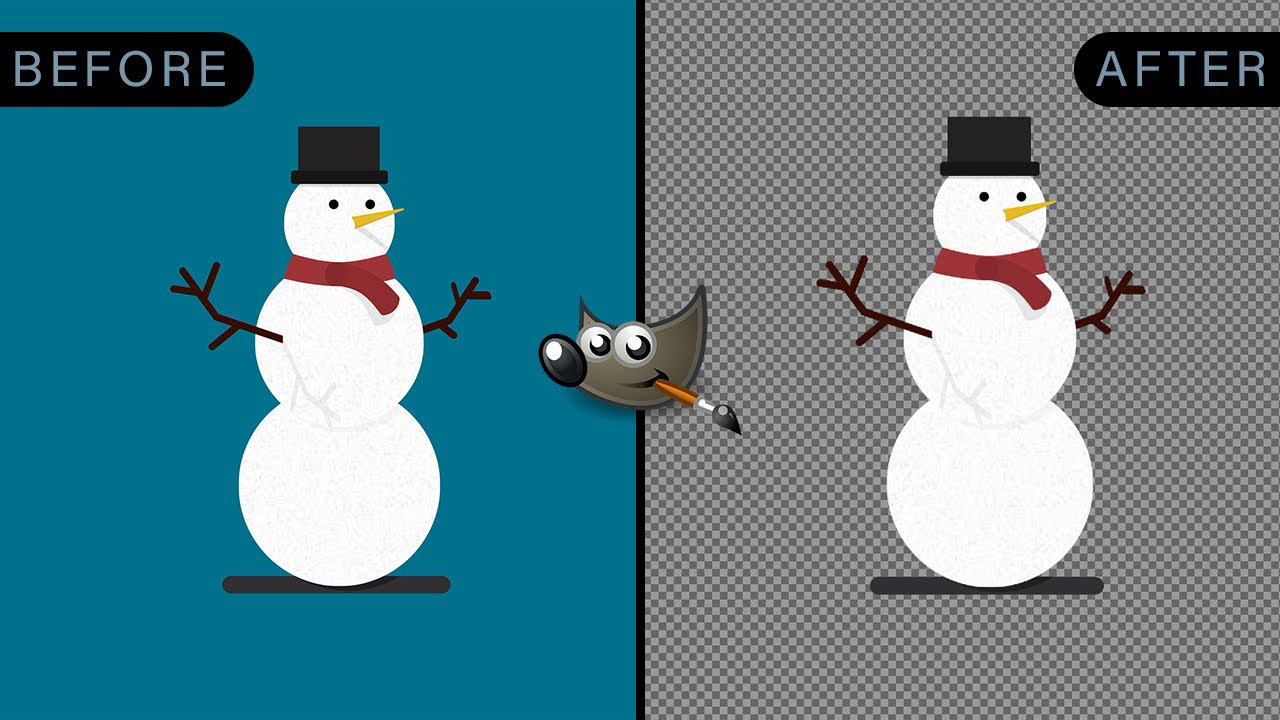
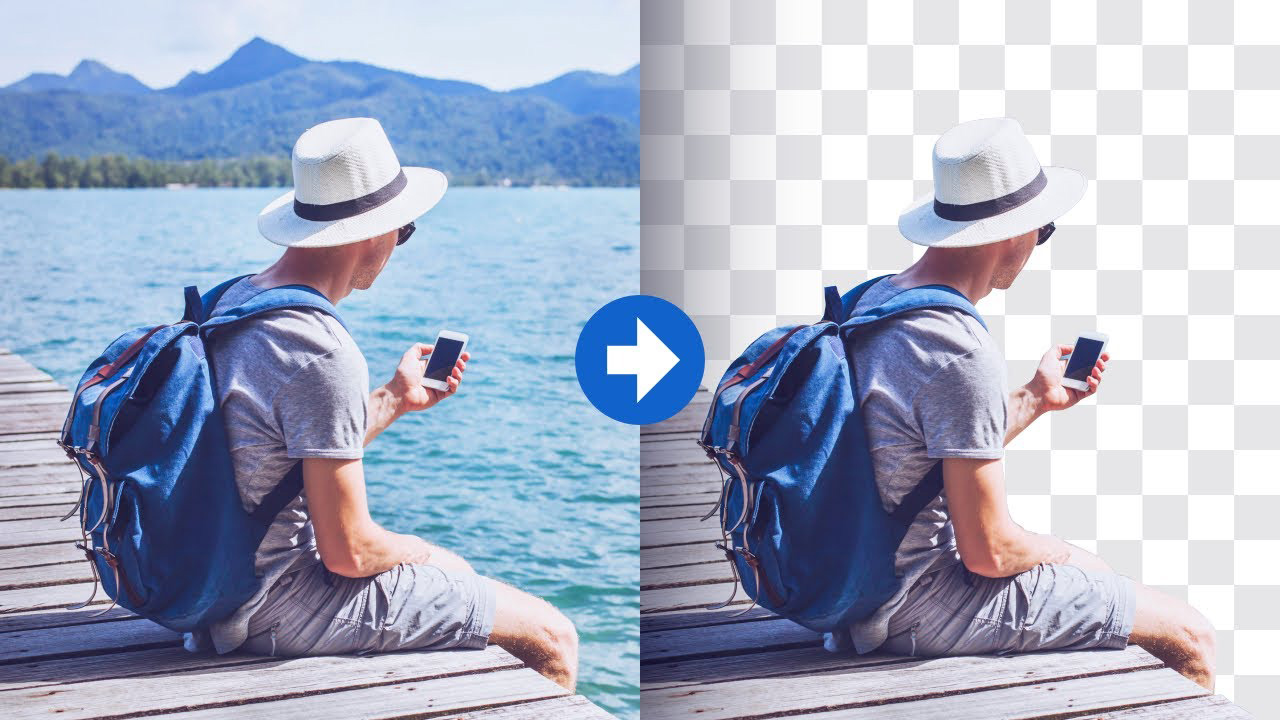
Removing an image background is a fundamental skill in digital imaging. It enables you to isolate subjects for composites, create transparent PNGs for web use, design marketing materials, or prepare photos for print. While AI-powered online tools have gained popularity for speed, GIMP offers complete offline control, pixel-level precision, and no recurring fees.
In this detailed 2026-updated guide, we’ll cover everything from downloading and installing GIMP to mastering multiple background removal techniques. By the end, you’ll have the knowledge to choose the right method for any image type—simple solid backgrounds, complex edges like hair or fur, or high-contrast subjects.
Why Choose GIMP for Background Removal?
GIMP remains actively developed, with the latest stable releases in the 3.0 series (as of early 2026) bringing improved performance, better non-destructive editing features, and refined tools. Key advantages include:
- Completely free and open-source—no hidden costs or watermarks.
- Cross-platform support for Windows, macOS, and Linux.
- Extensive toolset comparable to paid software, including advanced selection options.
- Full offline capability for privacy and reliability.
- Community plugins (e.g., AI-assisted removal via rembg integrations) for enhanced workflows.
Compared to one-click AI services, GIMP gives you manual refinement for superior edge quality on tricky subjects.
Getting Started: Downloading and Installing GIMP
Before diving into edits, ensure you have the latest version installed.
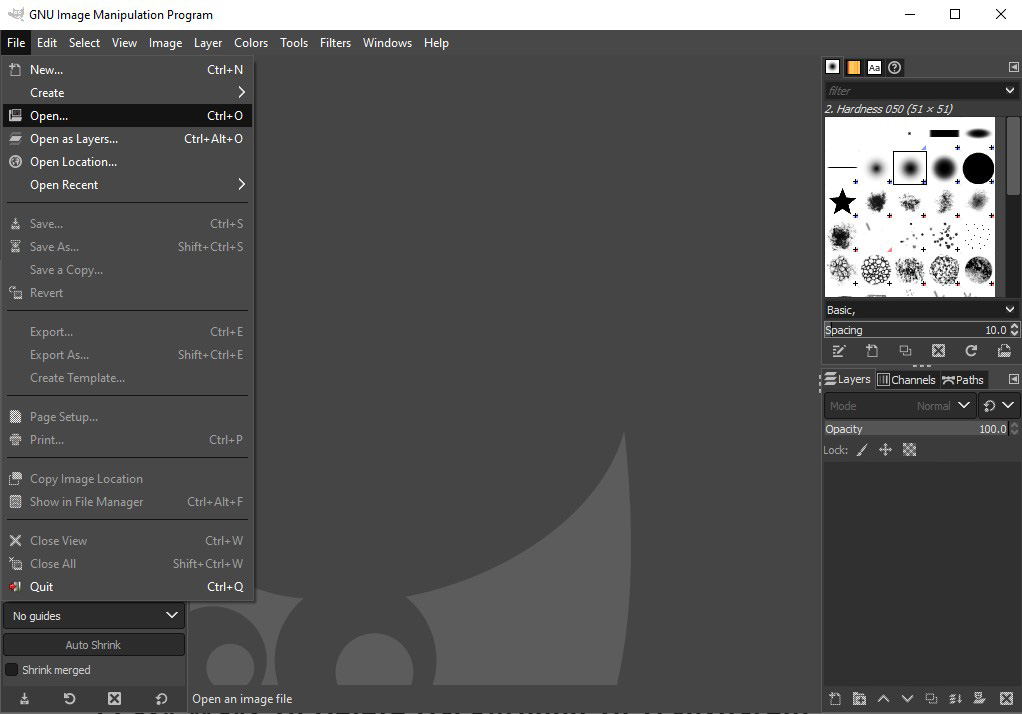
1. Visit the official website at gimp.org.
2. Navigate to the Downloads section and select the installer for your operating system (Windows .exe, macOS .dmg, or Linux packages).
3. Choose direct download or torrent for faster speeds on larger files.
4. Run the installer, select your preferred language, and follow the prompts. The process typically takes just a few minutes.
5. Launch GIMP—no activation or license key required.
Tip: Always download from the official site to avoid malware. Recent versions include enhanced stability and theme support for a modern look.
Once installed, familiarize yourself with the interface: Toolbox on the left, Layers/Brushes/Docks on the right, and main canvas in the center. Customize layouts via Windows > Dockable Dialogs for efficiency.
Important preparatory step for transparency: When opening an image (File > Open), right-click the layer in the Layers panel and select Layer > Transparency > Add Alpha Channel. This enables true transparency (checkerboard pattern) instead of white fill.
Essential Tools and Methods for Background Removal in GIMP
GIMP provides versatile options suited to different image complexities. We’ll explore the most effective ones, from quickest to most precise.
1. Fuzzy Select Tool (Magic Wand Equivalent)
The Fuzzy Select Tool in GIMP functions much like Photoshop’s Magic Wand. It offers a fast, efficient way to remove backgrounds by selecting areas with similar color tones. This makes it especially useful for isolating subjects against simple, solid backgrounds. Let’s explore how to use this tool effectively.
Step 1 – Open the Image:
First, open the image you want to edit in GIMP.
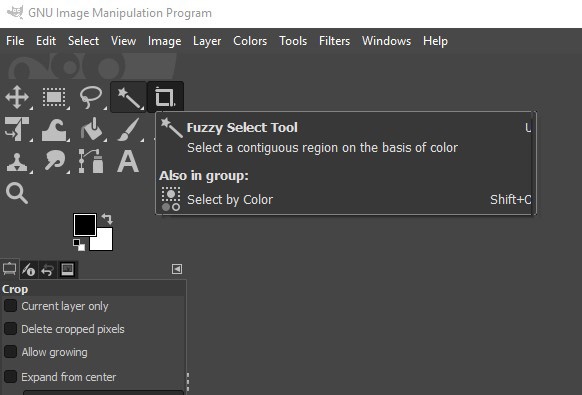
Step 2 – Select the Tool:
Select the Fuzzy Select Tool (magic wand icon) from the Toolbox or press U.
Step 3 – Select the Background:
Click directly on the background to make a selection. When working with a plain or solid background, a single click is usually sufficient for the tool to capture the entire area.
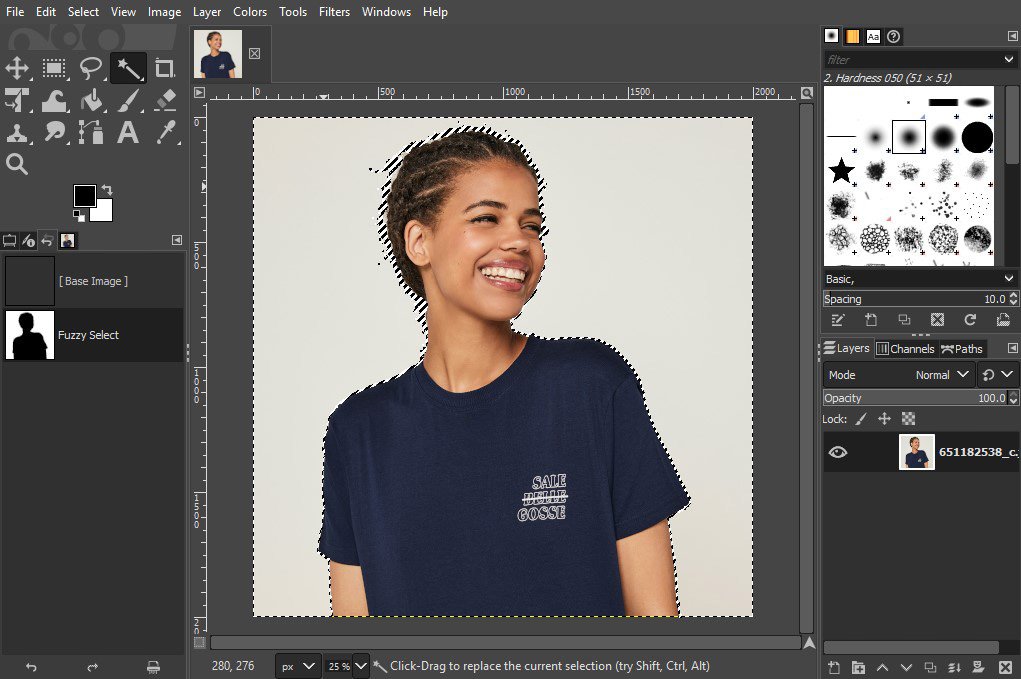
Step 4 – Remove the Background:
Press the Delete key to instantly remove the selected background.

You can zoom in to refine and remove finer details from the image. While the Fuzzy Select Tool provides a fast and convenient way to isolate areas, it works best with simple backgrounds. For images with complex details, its effectiveness may be limited.
2. Background Removal Using the Select by Colour Tool
You can also remove an image background in GIMP using the Select by Colour tool. This method is generally quicker and more straightforward than using the Fuzzy Select tool. Once you click a starting point, the tool automatically selects all pixels with the same color across the entire image canvas in a single action.
Follow the steps below to remove the background in GIMP using the Select by Colour tool:
1. Make sure an Alpha Channel is added, and enable Antialiasing, Draw Masks, and Feather Edges before starting the background removal process.
2. Activate the Select by Colour Tool by navigating to Tools > Selection Tools > Select by Colour or pressing Shift + O on your keyboard.
3. Click anywhere on the image to choose a starting point. The tool will select similar-colored pixels across the whole image. You can drag the cursor up or down to fine-tune the selection area.
4. Press Delete to remove the selected background. Repeat the process if needed until the background is fully removed. For more accurate results, zoom in and refine the selection as required.
3. Remove Background Using Foreground Select Tool
Images with complex subjects—such as fine hair or detailed edges—can be edited effectively using the Foreground Select tool in GIMP. This tool works by isolating the main subject from the background, allowing GIMP to automatically separate the foreground based on your selection.
Follow the steps below to remove the background in GIMP using the Foreground Select Tool:
1. First, add an Alpha Channel and enable Antialiasing, Feather Edges, and Draw Masks to prepare for the background removal process.
2. Choose the Foreground Select Tool from the menu by navigating to Tools > Selection Tools > Foreground Select Tool.
3. Draw a rough outline around the subject. Accuracy is not required at this stage; a general boundary is enough.
4. Press Enter, and GIMP will display the background in dark blue and the foreground in light blue.
5. Carefully brush over the subject to refine the selection, making sure you stay within the edges. Enable Preview Mask to check the result, then press Enter again.
Go to Select > Invert so the background becomes the active selection.
Press Delete to remove the background completely.
Pros: Handles fine details automatically better than manual tracing.
Cons: Requires good contrast between subject and background.
4. Background Removal Using the Paths Tool
The Paths Tool delivers the most precise and clean background removal results in GIMP, but it also requires more time and careful effort compared to other tools. This method works by creating a custom path around the subject, which is then converted into a selection to separate the main object from the background.
You can remove the background in GIMP using the Paths Tool by following the steps below:
1. Add an Alpha Channel and enable Antialiasing, Feather Edges, and Draw Masks before starting the background removal process.
2. Locate the Paths Tool from the menu by going to Tools > Selection Tools > Paths Tool.
3. Click point by point along the edge of the subject to outline the area you want to keep. You can create smooth curves by dragging the points to match the object’s shape.
4. Continue placing points until the entire outline is complete. Close the path by connecting the final point to the first one. Zoom in as needed for better accuracy.
5. Press Enter to turn the path into a selection. Then go to Select > Invert so the background, not the object, is selected.
6. Press Delete to remove the background and complete the process.
Pros: Editable paths; zoom for pixel-perfect accuracy.
Cons: Time-intensive but improves dramatically with practice.
Best combined with Zoom and a steady hand for detailed work.
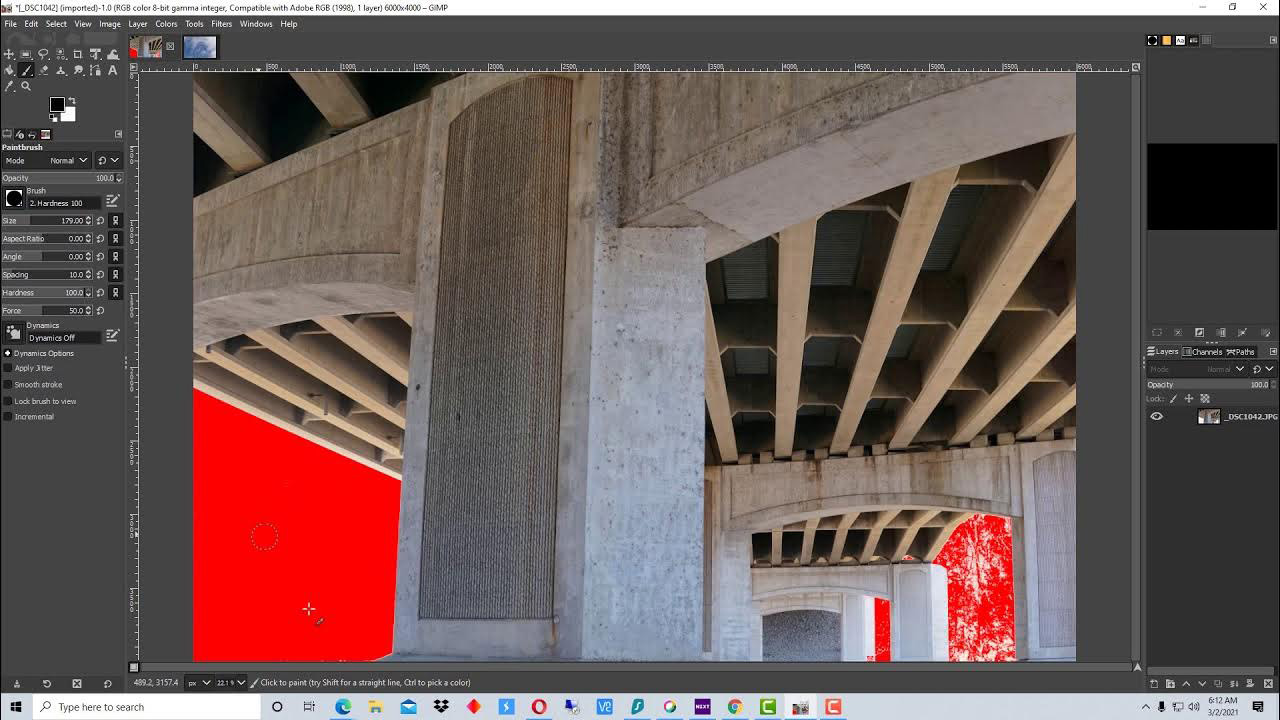
5. Quick Mask Mode for Precise Refinement
The Quick Mask Mode in GIMP is ideal for fine-tuning selections and achieving precise edges during background removal. It allows you to paint directly on the image to control which areas are selected or excluded, making it especially useful for refining complex details.
Follow the steps below to refine selections in GIMP using Quick Mask Mode:
1. Make sure an Alpha Channel is added, and enable Antialiasing and Feather Edges before starting the refinement process.
2. Activate Quick Mask Mode by clicking the Quick Mask icon at the bottom-left of the image window or pressing Shift + Q on your keyboard.
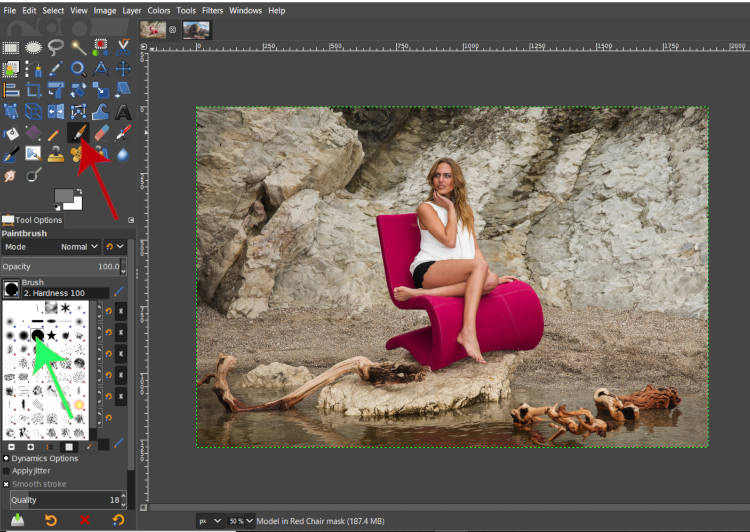
3. Use the Brush Tool to paint over areas you want to protect. Painted areas will appear in red, indicating they are not part of the selection.
4. Adjust the brush size and hardness to refine edges accurately, especially around fine details.
5. Press Shift + Q again to exit Quick Mask Mode and convert your painted mask into a selection.
6. Invert the selection if needed, then press Delete to remove unwanted background areas with improved precision.
Excellent for fixing edges on hair, fur, or translucent areas.
6. How to Add A Layer Mask in GIMP
Adding a layer mask in GIMP allows you to hide or reveal parts of a layer without permanently deleting any pixels. This non-destructive method gives you better control over edits and makes it easy to refine backgrounds, blend images, or correct mistakes later.
Follow the steps below to add a layer mask in GIMP:
1. Open your image and make sure the layer you want to edit is selected in the Layers panel.
2. Right-click on the selected layer and choose Add Layer Mask from the menu.
3. In the dialog box, select the mask option that fits your needs, such as White (full opacity) or Black (full transparency), then click Add.
4. Use the Brush Tool to paint on the layer mask. Painting with black hides areas, while painting with white reveals them.
5. Adjust the brush size and opacity to refine edges and details smoothly.
6. When finished, you can disable or delete the layer mask at any time without affecting the original imag
Pros: Non-destructive; great detail preservation.
Cons: Works best on high-contrast images.
Final Thought
In this comprehensive guide, we explored the step-by-step process of downloading and installing GIMP, followed by an in-depth examination of its powerful tools and techniques for effective background removal.
We trust this tutorial has equipped you with valuable insights and practical skills to enhance your image editing proficiency.
For those seeking professional-grade results with greater efficiency, particularly for high-volume or complex projects, consider complementing your GIMP expertise with expert outsourcing. Grasigner, a trusted leader in premium photo editing services since 2014, specializes in precise background removal, clipping paths, photo retouching, ghost mannequin effects, and full e-commerce image optimization.
To experience our commitment to exceptional quality firsthand, we invite you to take advantage of our no-obligation free trial. Simply upload your sample images, specify your required services and any custom instructions, and receive fully edited results within just one hour. This allows you to evaluate our precision, turnaround speed, and overall service excellence with zero risk.
Whether you’re refining personal projects or scaling professional workflows, combining self-taught techniques with reliable expert support can elevate your output to new heights.
Thank you for following along. We hope this resource inspires continued growth in your creative journey. Should you require assistance beyond DIY editing, Grasigner stands ready to deliver consistent, high-quality results tailored to your needs.
FAQ for Remove Image Background in GIMP
1. How can I remove the background of an image in GIMP?
You can remove an image background in GIMP using tools like “Fuzzy Select”, “Select by Color”, or layer masks. These tools let you isolate and delete the background for a transparent effect.
2. Which tool is best for removing complex backgrounds in GIMP?
For detailed or complex backgrounds, the “Layer Mask” method is recommended. It allows precise control without permanently deleting parts of the image, making it easier to refine edges.
3. Can I remove a background from a photo with multiple colors in GIMP?
Yes! Use the “Select by Color” tool to target specific colors or combine it with manual selection tools like the Free Select Tool for more accuracy.
4. Is it possible to remove the background without affecting the main subject?
Absolutely. By carefully using layer masks or zooming in for detailed selections, you can protect the main subject while removing unwanted areas of the background.
5. How do I save an image with a transparent background in GIMP?
After removing the background, export the image as a PNG. PNG format preserves transparency, unlike JPEG, which replaces it with a solid color.
The post How to Remove Image Background in GIMP Fast & Free appeared first on Grasigner .
]]>